# 8. Définir les notifications adressées par sa médiathèque

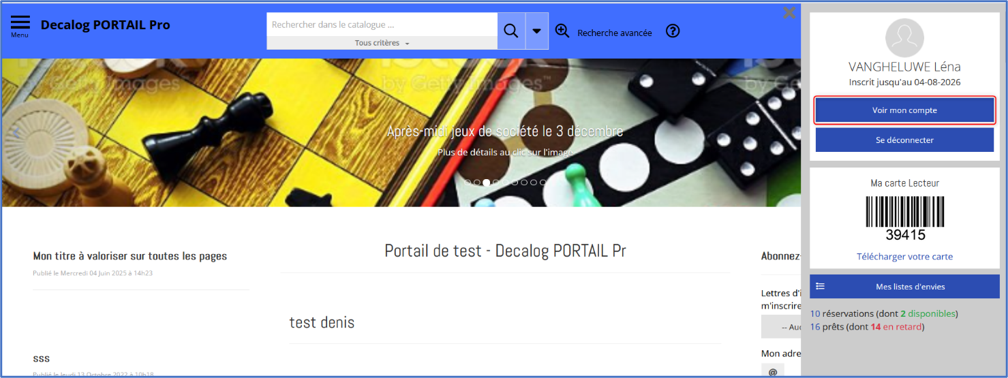
Depuis le compte abonné, vous pouvez définir les notifications adressées par la médiathèque. À partir de la fenêtre de synthèse de votre compte abonné, il faut cliquer sur <span style="mso-no-proof: yes;">le bouton ![image.png](https://bookstack.decalog.net/uploads/images/gallery/2026-08/scaled-1680-/STLimage.png) </span>.

[![image.png](https://bookstack.decalog.net/uploads/images/gallery/2026-08/scaled-1680-/Xz1image.png)](https://bookstack.decalog.net/uploads/images/gallery/2026-08/Xz1image.png)

Votre compte abonné s’ouvre. Il est alors possible de cliquer sur le bouton<span style="mso-spacerun: yes;"> ![image.png](https://bookstack.decalog.net/uploads/images/gallery/2026-08/scaled-1680-/mvXimage.png) </span><span style="mso-no-proof: yes;"> </span>.

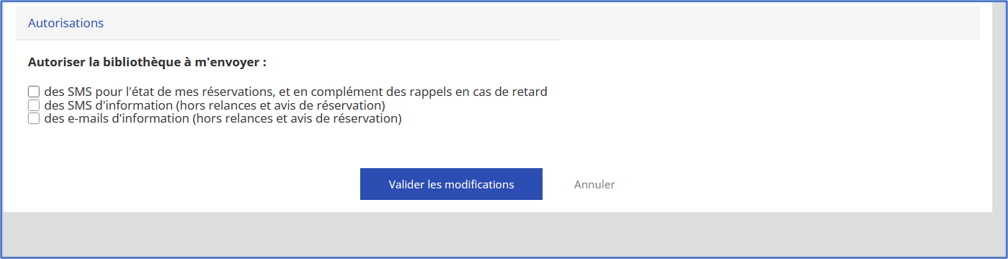
Une nouvelle fenêtre s’ouvre.<span style="mso-spacerun: yes;"> </span>Il suffit de procéder comme tel :

- Dépliez l’onglet ![image.png](https://bookstack.decalog.net/uploads/images/gallery/2026-08/scaled-1680-/fffimage.png).
- Cochez les cases souhaitées,
- Cliquez sur le bouton ![image.png](https://bookstack.decalog.net/uploads/images/gallery/2026-08/scaled-1680-/Yhdimage.png).
<span style="mso-no-proof: yes;"> </span>[![image.png](https://bookstack.decalog.net/uploads/images/gallery/2026-08/scaled-1680-/1uUimage.png)](https://bookstack.decalog.net/uploads/images/gallery/2026-08/1uUimage.png)

<span style="mso-no-proof: yes;"> </span>